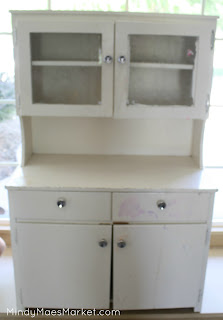
We ended part 1 with the hutch being painted. I didn't really dig the pink backing. Even with the cool {though unintentional} ombre-esque paint job. So with a hammer and a block of wood we pulled the nails.
From there I painted the back with Valspar Blue Oceans Breeze. I painted this -you guessed it... THREE times!
Here's the fun part! I had some leftover lace from the tabletops at my brother's wedding that I pulled out.
I placed it over the top and with white spray paint I sprayed a light mist over the top of the lace, over the top of the blue-painted backing.
Then I painted it more heavily {which is what you need to do to have the pattern show up}. I pulled the lace off and voila! I had a shabby chic backing for a minimal amount of effort!
We re-attached the backing to the hutch- nail holes were already made, so it was a breeze!
I attached some knobs from MindyMaesMarket.com...turquoise ceramic roses- which just HAPPENED to match the backing PERFECTLY! {Don't you love it when it all comes together like that?}
And clear knobs {because more rose ones were too big to close the doors...and it might have looked a BIT overdone.}.
Here it is finished and dressed up a little! I'm really happy with the amazing details!
Ready for the pink-crazed preschooler I re-finished it for!
From there I painted the back with Valspar Blue Oceans Breeze. I painted this -you guessed it... THREE times!
Here's the fun part! I had some leftover lace from the tabletops at my brother's wedding that I pulled out.
Then I painted it more heavily {which is what you need to do to have the pattern show up}. I pulled the lace off and voila! I had a shabby chic backing for a minimal amount of effort!
And clear knobs {because more rose ones were too big to close the doors...and it might have looked a BIT overdone.}.
Here it is finished and dressed up a little! I'm really happy with the amazing details!


