Showing posts with label DIY. Show all posts

Tuesday, August 28, 2012

DIY (Ikea) Tulle Lampshade....

 
I saw this super-cute lamp in my Ikea catalog. I really wanted it. It was such a neat looking lamp. Then I saw the price tag. $99.00. Dang. I don't think I've ever paid more than $10 for a lamp. It was a good thought.
 
 
Then I had an even better idea. I found a couple lamp shades at the last DownEast  sale. I took all the paper off of it and grabbed the tulle I had in my craft stash.


I began by cutting the tulle into 2-ft pieces. I cut the tulle so that it was enough to tie around the top with excess and to tie/glue at the bottom of the lamp shade with excess as well.

Once the pieces were cut, I combined four pieces together and then tied them at the top of the lamp- four to each "side" and then a group of eight pieces of tulle around each of the wires going down the side.


 As you can see- I have quite a bit of excess tulle. With one end of the tulle tied at the top, I let the rest flow down, in preparation for gluing to the lamp shade form.


 I tied the corner tulle (covering the additional form wires)  to keep it out of the way- it's purple mainly to differentiate the parts.


I pulled the tulle in sections (there were four- one for each side of the form) one-at-a-time through the center of the lamp shade form. I hot glued the INSIDE of the form first and laid the tulle flat against it- as neatly as possible. When that cooled I glued the OTHER side of the form and pulled/wrapped the tulle around that. This allowed the tulle to flare out to the sides of the lamp shade.

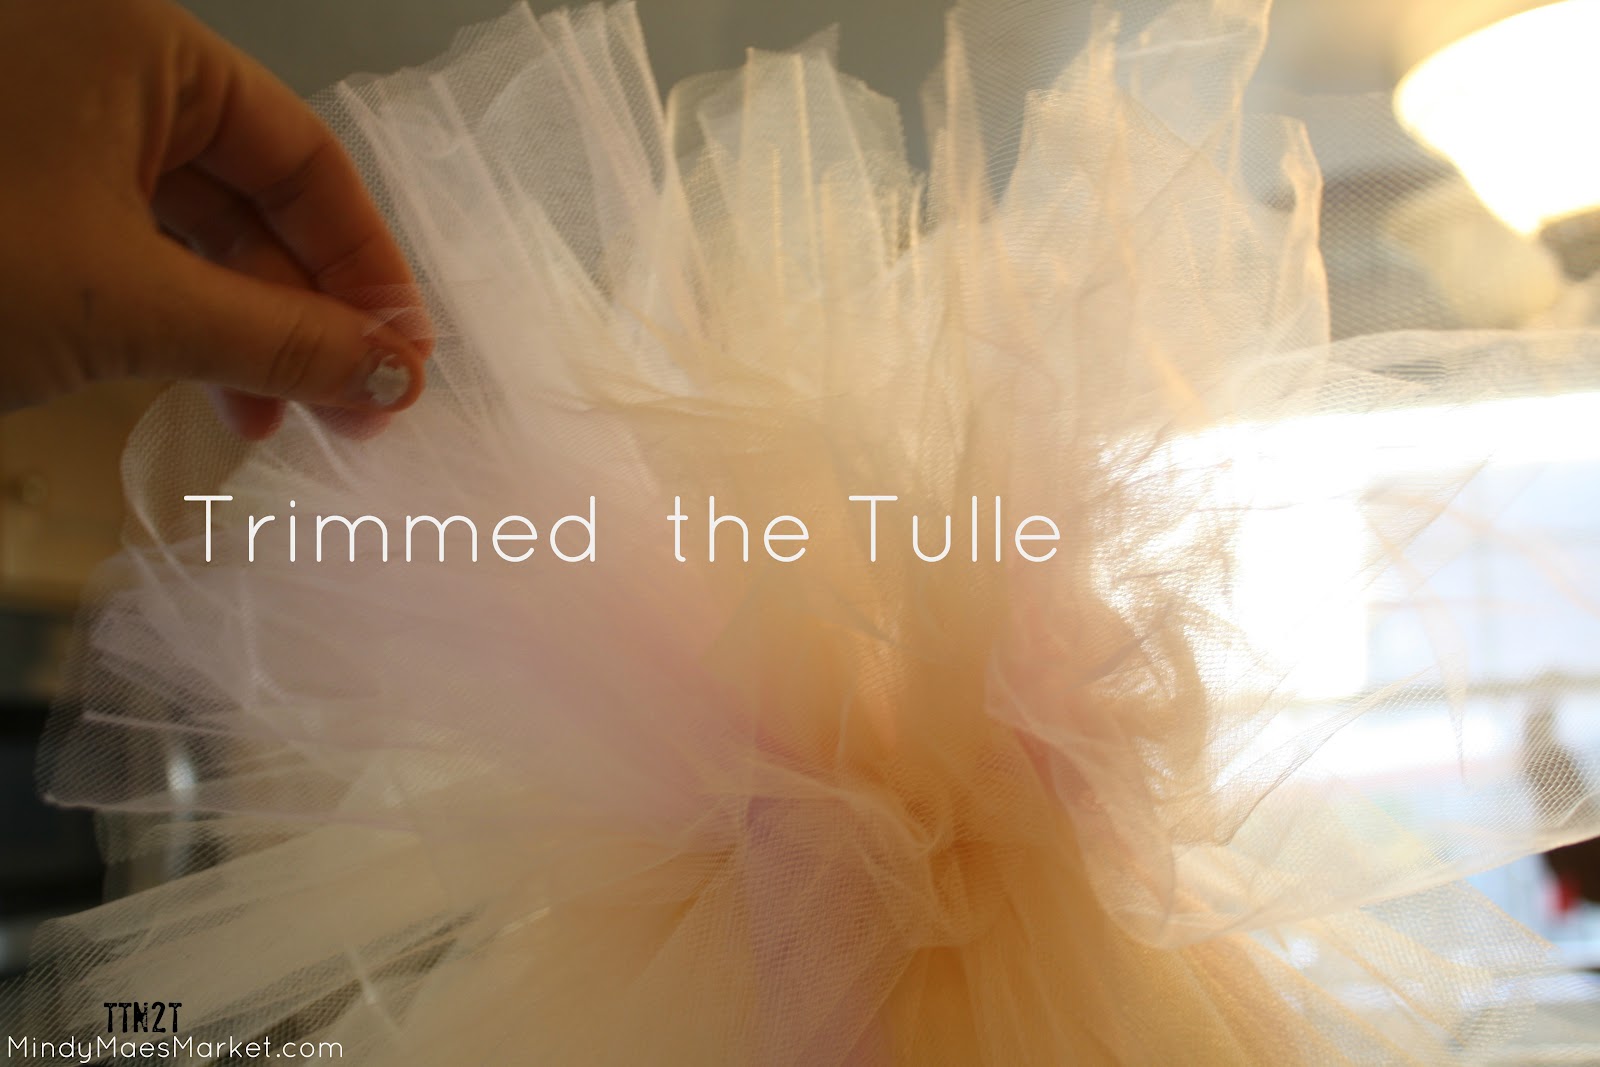
After I glued it all, I trimmed the bottom tulle so that it was approx. 3 inches long.

Here's the lamp with a trimmed bottom and untrimmed top/

Then I cropped the top. I cut the tulle down to match the length of the bottom.


Using the extra tulle that I had been trimming off I started to add more "poof" to the bottom half of the lamp.

I gathered approximately four-ish small pieces together. I folded them down, glued down the center (folded again, so the pieces were all glued together) and then glued this filler piece to the underside of the lamp.

It looked like this:
 I just repeated what I had done with the first tulle - just smaller 'chunks'.

After I added what I wanted I turned it over and trimmed it down {again}.

I really am pleased with the way it turned out. I must say that I really thought this was going to be a craft FAIL. So, my total for this lovely little lamp? Tulle: $7.00, Lamp: $3.50, Lamp Shade $1.50. Total {ish} $12.00! Far cry from $99.00- so I'm pretty happy about it.


Check out the AMAZING spray paint tutorials submitted this week over at MMMblog!

Wednesday, August 15, 2012

Turning This Into That....Children's Hutch Re-Do {Part Twoo}

 We ended part 1 with the hutch being painted. I didn't really dig the pink backing. Even with the cool {though unintentional} ombre-esque paint job.  So with a hammer and a block of wood we pulled the nails.

 From there I painted the back with Valspar Blue Oceans Breeze.  I painted this -you guessed it... THREE times!
 Here's the fun part! I had some leftover lace from the tabletops at my brother's wedding that I pulled out.

 I placed it over the top and with white spray paint I sprayed a light mist over the top of the lace, over the top of the blue-painted backing.
 Then I painted it more heavily {which is what you need to do to have the pattern show up}. I pulled the lace off and voila! I had a shabby chic backing for a minimal amount of effort!

 We re-attached the backing to the hutch- nail holes were already made, so it was a breeze!

 I attached some knobs from MindyMaesMarket.com...turquoise ceramic roses- which just HAPPENED to match the backing PERFECTLY! {Don't you love it when it all comes together like that?}
 And clear knobs {because more rose ones were too big to close the doors...and it might have looked a BIT overdone.}.

Here it is finished and dressed up a little!  I'm really happy with the amazing details!


Ready for the pink-crazed preschooler I re-finished it for!

Tuesday, August 14, 2012

Turning This Into That....Re-Do Children's Hutch


I'm gonna two-part this sucker because of the number of pictures.
Don't want you falling asleep on me. It's a boring hutch to Shabby Chic Sweetness!

We were given this cute little hutch for a birthday a couple years ago in this condition...


Yes. I know I should have re-done it before now....

My four year-old loves this grody thing and asks me to make it pretty all-of-the-time. My negligent decorating hasn't stopped her from playing with it and storing her most valued possessions in it{lip gloss, mostly}.


So it begins...now. I took it apart; hardware, drawers, doors. Trying hard not to be grossed out by the dried-on food and whatever else was now cemented to every part of this {cute, right?} hutch.

I commenced sanding. I am sanding in my family room. I was too tired to drag it outside and the carpet is on it's way out, anyway. It seemed more fun to do it this way...kinda rebellious. I won't lie. This thing took like three different sanding sessions. Every painted layer seemed to be less thick than the one before it, but with more dried-on drips. To get it back to smooth was a chore.
I took all the parts outside and primed them with Valspar spray primer. Can I just say how much I love that primer now comes in spray paint form? A.TON. It took me about three layers of primer, too. A good deal of exposed fake wood was present after my sanding and we had to help it all take on some paint.

I primed the hutch itself and was so {ehem} pleased to find that the whole back of the cabinet was made of particle board. Not the best for painting or avoiding splinters and slivers.

I then began spray painting the hutch with Valspar's 'Ballet Slipper'. Kinda giddy that I'm STILL spray painting. It's soo much easier than painting with a brush- perhaps it's just the fumes I'm inhaling? Three sprayed on layers, as well.

So three seems to be my magic number with this little get-up. Three trips to the store for paint, too!  Here's the painted hutch...for now. Tomorrow I'll show you the cute backing and the darling hardware

{from MindyMaesMarket.com of course}!

A sneak peek now of what's coming up later...

Have you ever started a project that you wanted to finish in a certain amount of time and it seemed as if EVERYTHING was working against you?

Here's a sneak-peek of the project that will be posting later today.
My final straw yesterday is when I couldn't take good pictures due to:
-screaming children
-lack of sunlight
-paint still not dried
-knob placement misjudgement

So. You'll see the unveiling later when I:
-duct tape the children {kidding....}
-have full daylight sun
-the paint is dried
-all the hardware is unpainted, unrusted and correctly installed.

Stay tuned! {You don't have to...I'll post it to Facebook when I'm done.}

Friday, August 10, 2012

Pulling You Along! Mindy Maes Market Knobs!


We just got these gorgeous knobs into the store and I just had to put them to work somewhere in my house!  I wasn't sure if I wanted a hanging rack...so I have a few other projects with these included, too!

We started with an old window we salvaged from a barn recently torn down. {Yay for fun finds!} 
 I just LOVE the paint and the hardware...the rust and the dirt {fabulous!}.


 We set out the knob to get a general idea for placement...isn't this going to be beautiful?


Here are the knobs...six different yummy designs!


We removed the hardware- so as to not ruin whatever wall the organizer would be hanging on.


 We pre-drilled the holes to make screwing them into place a little easier.

Then we commence with screwing each knob into place. This was harder than I anticipated. I now have rose-shaped tender-spots in each of my palms.

 
 Our finished product! So cute...AND functional!