Showing posts with label straws. Show all posts

Thursday, September 6, 2012

Boutique, BABY!

It's kinda like Christmas...a lot like Christmas.
Both sides...the innocent, believing child Christmas and the adult, magic-making Christmas. Putting on a boutique take prep work, emails, phone calls, signs, ads, mailers, flyers, blog buttons and posts. I takes time to find the right vendors that will bring products that will make our friends feel that rush of excitement when they step in through our doors. It's fun to plan, to map out, to watch details and figure final steps in orchestrating something like this, but then....

It's that giddy, nervous, hopeful -yes-I-may-throw-up-out-of -pure-excited-ness feeling WE get to experience, too. As vendors come in and set up, as we set up...as we walk through all the amazingly fun goodies that all of these lovely vendors have worked so hard to assemble and present. I don't sleep the night before- just like Christmas.

So even if it's not in your budget- you don't have to buy a thing...those feelings are all free and we'd love for you to come and experience Mindy Mae's Market. :D

Tuesday, September 4, 2012

This into That: School Spirit Wreath

 I had this wreath form that I intended to make a second straw wreath with. I also need something a little fun for my classroom. So I pulled out the form.

Pink is not a school color- but I really didn't want to cause more damage by taking off the ribbon- so I left it. I found some navy felt- which IS a school color. :)
 
 I haphazardly cut the felt sheets into one inch to one and a half inch felt strips.

Weilding my hot glue gun I started wrapping the felt around the ribbon-covered form.

Here is the wreath covered in felt.

I ALSO found some left-over striped straws- PERFECT! I cut them into thirds and halves. I used about 25 straws.
 
 Then I started gluing...and tying- sorry I had to see how it might look! I glued the straws close to the inner edge of the wreath.

I then made a hanger for the wreath...you know, so it can hang.

I finished tying the ribbons around the bottom corner of the wreath. I tied the scraps around the wreath and then slid them to stagger a bit around the wreath.

Here's my cute SCHOOL SPIRIT wreath! All set to find it's way into my classroom!

Head over to MMMblog to see our features for Organization Solutions!

Tuesday, April 10, 2012

Springy Straw Wreath

I loved the wreath Jen did over on TT&J...
so I decided to give it a Spring-y Twist!


I started with assorted paper straws....{I used about 76 straws}


 a foam wreath form from the dollar store, a glue gun...

 and I had some old satin-binding from a long-ago quilt project.

 I first cut the binding into two pieces, so that it would go further...just in case.

And  then I started wrapping.
{Don't mind the finger dents- my two year-old was "helping"}
I made sure that the finished edges were the ones showing....so wrap your first loop and then make sure the next loop covers the edge that would fray.

I reached the end of the form, cut the excess, folded the end of the ribbon and glued it down.

I started witht the straws...a little nervous about placement... Something I will say, I wish I would have over-placed the straws a little more- further into the middle of the wreath. Instead of placing them at what looked like the end of the form.

 I first started with a pattern of straw colors and then at the end I had to switch it up a bit because a whole pattern wouldn't fit. See if you can tell where that was....

I liked the look of differing size straws so I cut them in an every-other-one pattern. I just eye-balled it. I rather like the randomness of it that way.

 I finished it off {for now} with a bit of green binding I also had left over...tied it in a bow and secured it with a safety-pin {so that I can change it out next time I feel the need}.


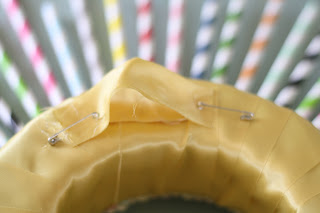
Last, I formed a loop with some left-over {again} yellow binding, folded and glued over, glued to the form and then secured with safety-pins. {I have issues with trusting the staying power of hot glue.}

 Here's the finish product...I LOVE the colors and the airy-ness of it!

 You'll see where this ended up in a future post!
Tip Junkie handmade projects